How to Preserve Family Recipes Before They Fade
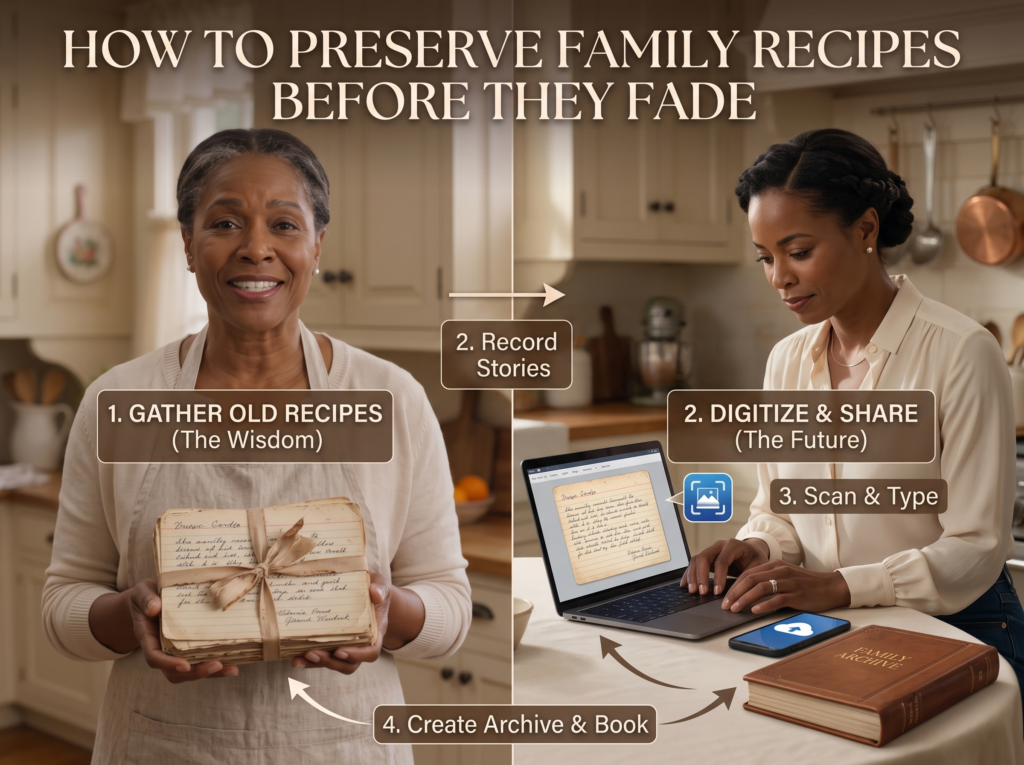
Food is much more than mere sustenance. It is a living time machine. When you recreate a dish your grandmother made, you are bringing her memory and her love directly back into the present moment. The smell of rising dough or the taste of a specific spice blend can transport you back to a childhood kitchen in a matter of seconds.
However, the handwritten cards that hold these precious instructions are incredibly fragile. Ink fades over the years. Paper turns yellow and brittle. Stains from butter and vanilla extract obscure the exact measurements. If you do not take action, these culinary heirlooms could be lost forever.
This comprehensive guide will show you exactly how to save old recipes, protect the original handwritten cards, and digitize your collection so future generations can continue your family traditions.
What is Family Recipe Preservation?
Family recipe preservation is the process of collecting, documenting, and archiving traditional culinary instructions and their associated stories so that future generations can cook, enjoy, and learn from them.
Step 1: The Gathering Phase
The first step in preserving family recipes is locating them. This sounds simple, but old recipes are rarely kept in one organized place. They are usually scattered across different households, tucked inside old books, or memorized in the minds of older relatives.
Check the obvious and hidden places. Start by looking through old recipe boxes and three ring binders. You should also check the margins of vintage cookbooks. Many home cooks would jot down their own modifications directly onto the published pages. Check inside kitchen drawers, old photo albums, and even family Bibles where important papers were often kept flat and safe.
Reach out to your extended family. Send an email or a text message to your aunts, uncles, and cousins. Ask them to check their own kitchens for any handwritten index cards. You might be surprised to find that your cousin has the only surviving copy of your great grandmother’s famous pound cake.
Interview your living relatives. Many of the best recipes were never actually written down. They live entirely in the memories of the people who cook them. Set up a time to visit older relatives and ask them to walk you through their signature dishes. It is crucial to record these conversations. Set up your smartphone voice memo app while they talk, or better yet, set up a camera in the kitchen and film them actually making the dish. This ensures you capture the subtle techniques that cannot be easily explained in words.
Step 2: Protecting the Physical Originals
Once you have gathered the physical recipe cards and paper clippings, you must protect them from further decay. Paper is highly sensitive to light, moisture, and the natural oils on human hands.
Clean your hands before handling. Always wash and thoroughly dry your hands before touching old paper. The oils from your skin can accelerate the degradation of the paper and ink. You can also wear clean cotton gloves for extra protection.
Use the right storage materials. Never use standard plastic photo albums or cheap plastic sleeves from an office supply store. These materials often contain PVC, which emits chemicals that will destroy paper over time. Instead, you should invest in archival quality sleeves. Look for products specifically labeled as acid free and lignin free. You can find excellent guidelines on handling delicate paper at the National Archives website.
Store them in a safe environment. Keep your original recipe box in a cool, dry, and dark place. Extreme temperatures and high humidity will cause the paper to warp and encourage mold growth. Avoid storing these precious documents in attics, basements, or near heating vents.
Step 3: Digital Archiving, The Modern Way
Physical preservation is only half the battle. To truly ensure your recipes survive, you must create digital backups. Digitizing family cookbooks allows you to share the collection with relatives across the country with a single click.
The Digitization Process
- Prepare your workspace. Find a spot with bright, even, and natural lighting. Avoid harsh overhead lights that cast dark shadows over the paper.
- Choose your scanning method. You can use a traditional flatbed scanner for the highest resolution. Alternatively, you can use high quality smartphone applications. Apps like Adobe Scan use your phone camera to capture the document, automatically cropping the edges and enhancing the faded ink.
- Scan at a high resolution. If you are using a flatbed scanner, set the resolution to at least 300 DPI. If the handwriting is very faint, bump the resolution up to 600 DPI so you can zoom in later without losing clarity.
- Organize your digital files. Do not leave the files named with random numbers like “Scan001.jpg”. Rename every file immediately with a descriptive title. Use a consistent format such as “RecipeName_RelativeName_Year”.
- Back up everything. Upload your organized folders to a secure cloud storage service. You should also save a copy on a physical external hard drive. Having multiple backups in different locations is the golden rule of digital archiving.
Step 4: Transcribing and Translating Old Handwriting
Scanning the recipes protects the visual memory, but you also need typed versions. Reading cursive handwriting from fifty years ago can be quite difficult for modern readers. Faded ink and grease stains make the job even harder.
Take your time decoding. When you transcribe the recipes, type them out exactly as they are written first. Do not try to correct spelling mistakes or fix the grammar yet. You want to preserve the authentic voice of the original cook.
Translate vintage measurements. Old recipes often use measurements that are no longer standard. You might see phrases that require a bit of historical translation.
Common Vintage Recipe Terms vs Modern Equivalents
| Vintage Term | Modern Equivalent | Notes |
| A pinch | 1/8 teaspoon | Roughly what fits between your thumb and index finger. |
| A dash | 1/16 teaspoon | Slightly less than a pinch. |
| A smidgen | 1/32 teaspoon | A very tiny amount. |
| A teacup | 1/2 to 3/4 cup | Standard measuring cups were not common until the 1920s. |
| A slow oven | 300 to 325 degrees Fahrenheit | Used before ovens had precise temperature dials. |
| A moderate oven | 350 to 375 degrees Fahrenheit | The standard baking temperature today. |
Add modern context to the notes. After you type out the exact original text, add a separate section for modern notes. This is where you can clarify the instructions, convert a “teacup” to standard measuring cups, and provide exact oven temperatures.
Step 5: Testing the Heirloom Recipes
You cannot assume an old recipe will work perfectly on the first try. Ingredients have changed over the decades. Flour is milled differently, and modern eggs are often larger than the eggs gathered from a backyard chicken coop in the 1940s.
Follow the original instructions first. For your first test batch, follow the transcribed recipe as closely as humanly possible. Take detailed notes as you cook. Document how the batter looks, how long it actually takes to bake in your modern oven, and how the final product tastes.
Make necessary adjustments. If the cake turns out too dry or the stew is too salty, make small adjustments for your second batch. Always document your changes. When you finally create the perfect modernized version, you will want to include both the original instructions and your updated notes in the final archive.
Step 6: Sharing the Culinary Legacy
Preserving family recipes is ultimately about sharing them. Keeping the digitized files locked away on a hard drive defeats the purpose of the project. You need to present the collection in a way that encourages your family to actually use it.
Create a bound family cookbook. You can use online self publishing services to create beautiful, printed cookbooks for your relatives. Include the typed recipe, a photo of the original handwritten card, and a picture of the finished dish. You can find inspiration for cultural preservation from organizations like the Southern Foodways Alliance, which beautifully documents regional food history.
Include the personal stories. A recipe for peach cobbler is great, but the story of how your grandmother baked that cobbler every Sunday morning is what makes it a treasure. Write down the history of the dish. Capture the memories associated with it. Just as we see in The Barbara Journal, capturing a family’s history requires intentionality and a dedicated space for reflection and record keeping. Combining the food with the emotional legacy elevates a simple cookbook into a family heirloom.
Recipe Preservation Checklist
Use this checklist to ensure you do not miss any vital steps in your preservation journey.
- Gather all physical cards, clippings, and old notebooks.
- Ask extended family members for their hidden recipes.
- Interview older relatives to record unwritten dishes.
- Clean your hands before touching vintage paper.
- Place fragile cards into acid free archival sleeves.
- Scan every document at a minimum of 300 DPI.
- Rename digital files with clear, descriptive titles.
- Back up digital files to the cloud and an external hard drive.
- Transcribe the handwritten text exactly as written.
- Add modern measurement translations and baking notes.
- Cook and test the recipes to ensure modern accuracy.
- Compile the recipes and their stories into a shared format.
Common Mistakes to Avoid
Even with the best intentions, people often make critical errors when trying to save old recipes. Avoid these common pitfalls to protect your culinary history.
Laminating the original cards. This is the most common and destructive mistake people make. Lamination is a permanent process. The heat and the adhesive chemicals will eventually destroy the paper and the ink. Once a card is laminated, it can never be properly restored by an archivist. Use acid free plastic sleeves instead.
Throwing away the original copies. Some people think that once a document is scanned and digitized, the physical paper is no longer needed. Never throw away the original handwriting. The physical paper holds historical value, emotional weight, and tangible connection to your ancestors.
Focusing only on the ingredients. A list of ingredients is just a chemical formula. The true value of an heirloom recipe is the context. Failing to record who created the dish, when it was typically served, and the memories associated with it strips the recipe of its soul.
Best Practices for Heirloom Recipe Preservation
To truly honor your family history, elevate your project by following these expert best practices.
Capture the stains and the damage. When you scan your recipes, do not use photo editing software to erase the grease stains or the faded edges. Those imperfections tell a story. A butter stain on a cookie recipe proves that the card was loved, used, and present in the heart of the kitchen.
Create a collaborative project. Do not take on the entire burden yourself. Create a shared digital folder and invite your siblings and cousins to upload their own photos and recipe scans. This turns the preservation effort into a bonding experience for the whole family.
Host a legacy dinner. Once your modern cookbook is compiled, host a family gathering where every dish served is from the new archive. This breathes immediate life into the project and creates new memories centered around the old traditions.
Frequently Asked Questions
Why should I preserve family recipes?
Preserving these instructions protects your family history. Food is deeply tied to cultural identity, and saving these recipes ensures future generations can experience the exact flavors and traditions that defined their ancestors.
What is the best way to scan old recipe cards?
The best method is using a flatbed scanner set to a high resolution of 300 to 600 DPI. If you do not have a scanner, high quality smartphone applications designed for document scanning are a great alternative.
How do I protect fragile paper in the kitchen?
Never bring the original, fragile index cards into a messy kitchen environment. Always cook from your typed digital copies or a photocopy. Store the originals safely away in archival sleeves.
How do I read faded handwriting on old paper?
Scan the document at a very high resolution and open it on a large computer monitor. You can adjust the contrast and brightness settings on your computer to make the faded ink stand out more clearly against the paper.
What if an old recipe does not have exact measurements?
You will need to use trial and error. Start with small, logical estimates based on similar modern recipes. Document every change you make during the cooking process until you replicate the correct taste and texture.
Can I use regular plastic sleeves to store my cards?
No, you should avoid standard plastic sleeves. Cheap plastics contain chemicals that break down over time and will damage the ink and paper. Always purchase sleeves that clearly state they are acid free and archival safe.
How do I find a recipe my grandmother never wrote down?
The best approach is to interview her or anyone who frequently cooked with her. Ask very specific questions about the steps, the smells, and the textures. If she is still able to cook, film her making the dish so you can document her exact hand movements and pinches of spice.
What should I do with recipes I don’t like?
You should preserve them anyway. The goal of an archive is historical accuracy, not just creating a menu of your personal favorites. A recipe you dislike might be deeply cherished by another relative, or it might hold significant cultural value for your family lineage.
Conclusion
The food we cook tells the story of who we are and where we came from. Every handwritten index card is a chapter in your family history, completely unique and entirely irreplaceable.
Do not wait until the ink fades completely or a fragile card is accidentally lost during a move. The process of gathering, protecting, digitizing, and sharing these culinary treasures takes time, but the reward is permanent. You are not just saving instructions for a casserole; you are saving the spirit of your family gatherings.
Take action today. Go find one handwritten recipe, slip it into a protective sleeve, and type out the ingredients. By taking that first simple step, you become the active torchbearer of your family legacy, ensuring that the wisdom of the past continues to nourish the generations of the future.